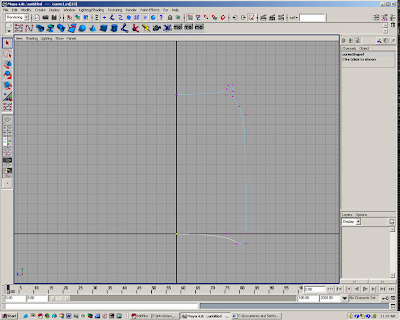
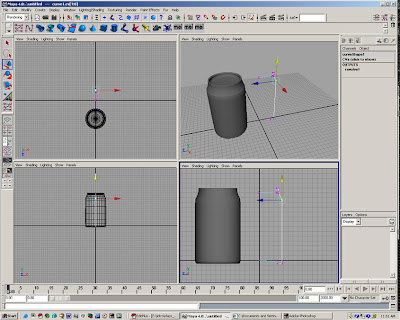
1. The first step in making the soda can is to create a profile in section, this will be used as a source profile for the revolve tool to generate the can so. You should only draw 1/2 of the can in profile. Use the Grid Snap to ensure that the starting and ending points of your CV curve fall directly on the Y-axis, and don't forget to draw the profile in one of the side viewports so the can will be oriented the correct way. When you are done drawing your curve, hit the 'Enter' key on your keyboard to complete the tool.
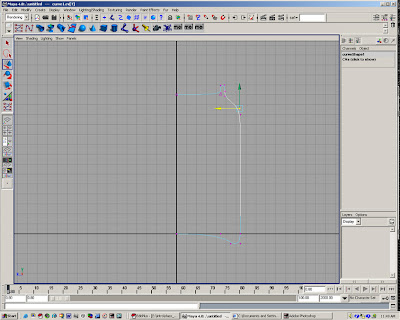
2. After drawing the curve you can select CV's and adjust their position to more realistically approximate the shape of the can in profile.
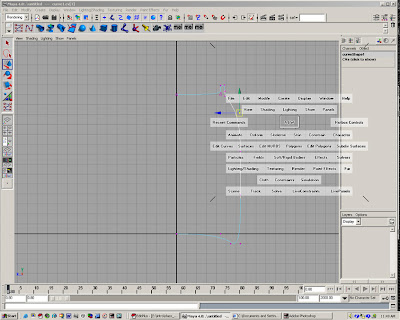
3. To create the hard creased corners that the can has in a few places, you can use the 'CV Hardness' tool, this increases the strength (or weight) of the CV relative to other CV's in the curve. To use this select a CV on the curve and choose the 'CV Hardness' Tool under 'Edit Curves' The curve should make a sharp bend at the CV.
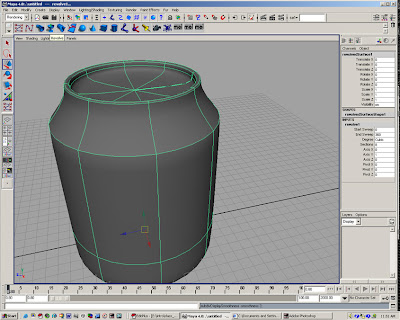
4. Right-click on the curve to select the entire curve (instead of just one of the CVs) and click the 'Revolve' tool in the toolbar at the top. This will revolve your curve around the Y-Axis and create a surface. You can press the 5 key to shade the surface. Also, you will need to hit the 3 key on the keyboard to increase the display resolution of the surface so it appears less facetted.
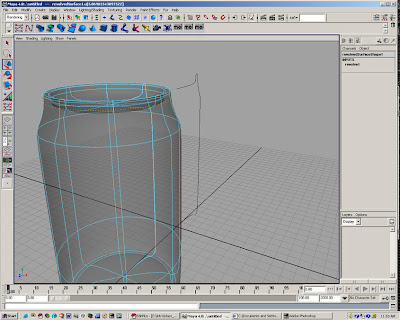
5. You can move the new surface aside and select CVs on the original curve to adjust the surface shape again to appear more realistic.The Top1. To focus work on the top of the can, and also so that you could later give it a different material than the bottom, it is best tp detach it from the bottom of the can. This also more realistically represents how the can is actually constructed as two separate sheets of metal. To detach the top, right click on the surface and choose 'Isoparms', click on one of the isoparms going around the can and drag upwards along the can until you get near the top. When you release the mouse, a yellow dotted line should remain on the surface of the can to show you which isoparm you have selected. If you now choose 'Detach Surfaces' from the 'Edit NURBS' pull-down menu the surface of the can will be separated at the isoparm you selected. Now it is two separate pieces. You may need to hit the 3 key to increase the dipslay resolution of the surfaces so they appear less faceted.
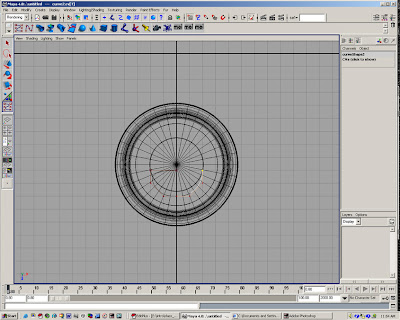
6. To cut the hole in the top of the can, switch to the top view and begin drawing a curve that is the shape of the hole. Use the grid snap to ensure the shape is symmetrical. When drawing, do not complete the curve, but draw all but the last point. Select the curve after you finish drawing and use the 'Open/Close Curve' tool to close the curve. The 'Open/Close Curve' tool is located under the 'Edit Curves' menu. When you use the tool, click on the options box (select the little box next to the name when you choose the tool) and make sure the option of 'Ignore' is selected under 'Shape'. Click 'Apply' and the curve will be closed.
7. In the top view, select the new curve and the top of the can. Choose 'Project Curve on Surface' from the 'Edit NURBS' pull-down menu. This will project the curve onto the surface so you can use it for a trim operation.4. Select the top of the can and return to the perspective view. Select the 'Trim Tool' from the 'Edit NURBS' menu. The surface will turn into a white lattice. Click the cursor in the area you wish to keep and hit the 'Enter' key, the hole will be trimmed away. You will need to hit the 3 key again to increase the display resolution of the surface.
The Pull-tab
1. To create the pull-tab, draw a curve in the top view that is approximately the size and shape of the pull-tab. Use the 'Open/Close Curve' tool to close the curve, and move the CVs to adjust the shape.
2. Select the curve and choose the 'Bevel' tool from the 'Surfaces' menu. This will create a beveled edge surface for your tab. The proportions will most likely be completely wrong, so adjust the height of the extrusion and the depth of the bevel edges by changing the 'Width', 'Depth' and 'Extrude Depth' settings in the Channel Box on the right side of the screen. If you click on one of the settings (such as 'Width') and then select the 'Show Manipulator' tool on the left of the screen, small blue graphical manipulators will show up on the surface and you can interactively adjust the settings.
3. Once you have a satisfactory beveled surface created, you can make a top for it by creating a planar surface patch. Right-click on the beveled surface and select 'Isoparm', click on the top edge of the beveled surface to select the edge isoparm, it should be highlighted in yellow. Next choose the 'Planar' tool from the 'Surfaces' menu, a surface will be created that fills the top of the pull-tab.
4. Switch to the top view and draw a curve to create a hole in the pull-tab. Use this curve to project on the surface and trim, the same way you cut a hole in the top of the can.
5. Once your pull-tab is complete you will need to move it into position on the top of the can. Before you do this it is important to delete the 'history' from the surface, if you do not, as you move them to a new position the trimmed hole and other elements will change. To delete the history, select the beveled surface and the top face and choose 'Delete By Type->History' from the 'Edit' menu. Now you can move the pieces into place on the top of the can.
6. Use the move and rotate tools to position the tab properly at the top of the can.
http://www.arch.columbia.edu/ search maya tutorials


No comments:
Post a Comment